How do You Cut Down a Big Tree?

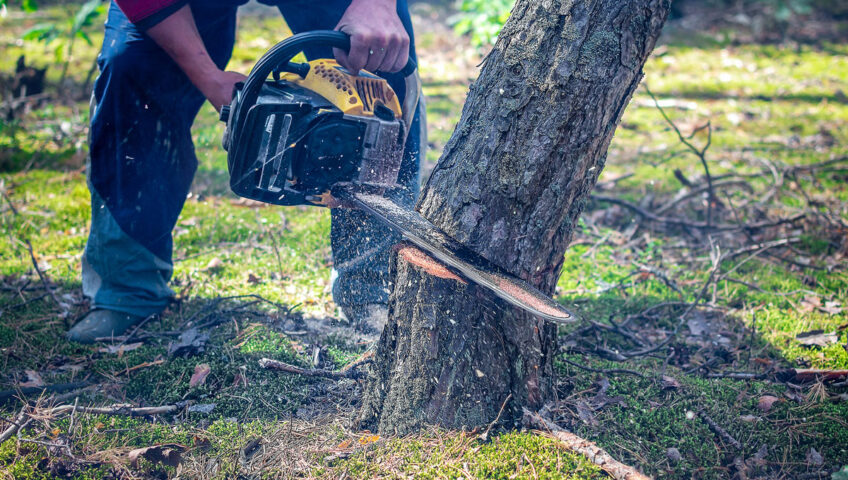
If you have a big tree that is dying, or that is posing a danger to your home, often the best decision is to cut it down. This task should only be tackled if you are comfortable with a chainsaw, and willing to follow a few different safety precautions. If you’re looking to cut down a tree, here are nine steps you should follow to do it safely and correctly.

  1. Decide if it’s Safe

While cutting down small trees is often a quick and easy process, cutting down larger ones is a pretty big job. If the tree has a lot of broken or dead branches, or if it has an undiagnosed disease, it is best to call an expert for help. Dead or loose branches can fall on you while you are working, and some diseases can be spread if you aren’t careful. Walk around your tree to check for these issues. While you’re at it, check to make sure you aren’t at risk of knocking down any power lines or hitting any buildings. If these obstacles are in your way, it is going to be safer to call in an arborist to deal with the tree for you in a safe way.

  1. Gather Equipment

As with all DIY jobs, making sure that you have the right safety gear should be the first task on your list. Here is what you will need to cut down a tree:

  • Hard hat
  • Safety glasses
  • Hearing protection
  • Work gloves
  • Chainsaw
  • Felling wedges

Another good safety idea is to have a friend or family member on hand to help. A second set of eyes can alert you if anything is going wrong, or if something or someone comes too close to the tree while you are working on cutting it down.

  1. Estimate the Fall

Before you start cutting, you need to figure out where the tree is going to fall. If it has more branches on one side than another, it will fall that way regardless of how you cut it. You will also need to estimate how tall the tree is so you can be sure there is enough room for it to fall. One trick to estimate this is to hold an ax at arm’s length, close one eye, then walk away from the tree. When the top and bottom of the ax are lined up with the top and bottom of the tree, you are standing about where the top of the tree will be when it falls.

  1. Plan Escape Routes

Having at least two escape routes planned in advance will ensure that you have a clear path to get away if anything goes wrong. Make sure the routes are clear of debris, and will take you far enough away that, if the tree falls where you don’t want it to, you aren’t at risk of getting hit by it.

  1. Plan the Notch

The notch is what will determine which direction the tree falls in. The notch needs to be on the “fall side” of the tree, which should also be the heaviest side of the tree. Make sure to plan the notch at a comfortable working height, so you aren’t having to bend over too far. The stump can always be cut down closer to the ground, or removed entirely, once the tree is gone.

  1. Cut the Notch

Start with the top cut of the notch, moving at about a 45 degree downward angle. Cut about ⅓ of the way into the trunk. Then, make a second cut below the first parallel to the ground. This cut should meet, or come pretty close to meeting, the first cut.

  1. Insert Wedges

If the tree’s trunk is more than 18 inches in diameter, you will need to use felling wedges. These handy plastic devices help prevent your saw from becoming trapped in the tree while you are cutting. These wedges need to go into the bottom cut as soon as you’ve cut deep enough to get them inserted. Stop cutting, pound them in with a hammer, and then complete the cut.

  1. Make the Felling Cut

This is the cut that will make the tree fall. You will make this cut on the opposite side of the tree from the notch. Start the cut about an inch above the notch, keeping the chainsaw parallel to the ground. Go slowly, as you do not want to cut all of the way through. Once the tree starts to fall, stop cutting and walk one of your escape routes to get out of the way.

  1. Remove Branches and Cut into Firewood

Once the tree is down, the next step will be removing all of the branches from the trunk. After that, cut the tree truck into more manageable pieces for removal. You can either keep the tree for firewood, or call your city to ask about proper disposal options.

When in Doubt, Get Expert Tree-Cutting Help

While cutting down a tree may seem like no big deal, it can in fact pose a risk to your property. From trees that fall where you don’t want them to, to trees that are taller than the area they have to fall in, there are many issues that can arise when you take down a tree. When in doubt, it is always best to call on a professional for help. Our licenced arborists have years of training with all types of tree services, and can help by taking down your tree in the safest, most efficient way. Give us a call anytime for a free consultation.

10 Plants That Look Great Year-Round

Many people think of a winter lawn as being bare and boring. But even with snow and cold temperatures, you can still have a yard that looks beautiful. There are plenty of different plants that look great year-round, no matter how low the temperatures get. Here is a list of ten different plants that you can add to your landscaping to make your yard look beautiful every season of the year.

Blue Ice Bog Rosemary

Blue ice bog rosemary is an evergreen ground cover with unique silvery-blue foliage that looks good in all seasons. What’s more, it becomes covered with pink bell-shaped blooms in early spring. It is happy in both rocky areas and moist soils, and it attracts birds and pollinators.

Carsten’s Wintergold Mugo Pine

This variety of pine is a dwarf, making it great for smaller areas. When cold weather arrives, it’s needles turn from green to gold. And the colder the weather, the more intense the gold color becomes. It is also deer-resistant, making it a great option for yards in more rural areas.

Weeping Norway Spruce

This spruce has a lot of visual interest thanks to its unusual weeping branches and showy cones. It makes a great accent in any landscape thanks to its year-round rich green color.

Tiny Buttons Stonecrop

If you’re looking for an evergreen ground cover, consider tiny buttons stonecrop. This plant creates a thick, full carpet of greenery all year round. In colder months, the foliage may become reddish, making it a lovely contrast against snow. It will also bloom with small white flowers during the summer, which attracts butterflies.

Siberian Carpet Cypress

Another ground cover option is Siberian carpet cypress. These short, colorful shrubs stay green for most of the year, but in colder months turn into a coppery purple color.

Frosty Fire Dianthus

Another low plant option, frosty fire dianthus is a great plant to use to fill in around larger shrubs or trees. It’s evergreen foliage looks lovely all winter long, and during the summer it will be covered with colorful flowers, giving you a nice variety of displays throughout the year.

Dwarf Globe Blue Spruce

If you like evergreens but need a little color variety, dwarf globe blue spruce is a great option. Their branches are densely covered in blue needles that become more colorful during summer months. It makes a great low hedge, and thanks to its low height can be combined with different evergreens for a lovely display.

Pink Pussytoes

Pink pusstoes are another evergreen ground cover option. They are slow growers, meaning they are easy to keep from taking over your garden beds. In the late spring, these plants will have fuzzy, deep pink flowers. They require little water once they are established, making them a great option for low-water yards.

Snowdrops

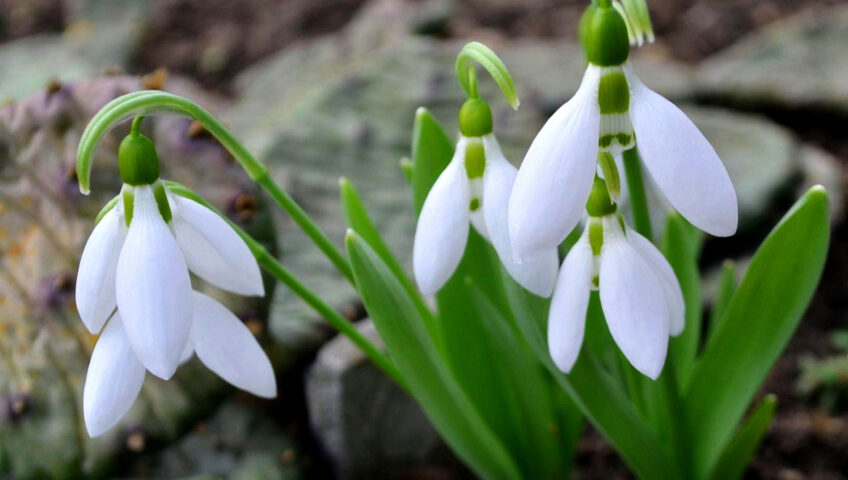
If bulb flowers are more to your taste, consider adding snowdrops to your landscape. These bulbs thrive in the cold temperatures. Simply plant them in the fall and enjoy their blooms throughout winter. They’ll go dormant in spring, and if they are left in place will bloom again the following fall.

Christmas Rose

While it is in fact a type of hellebore, Christmas rose plants are still a lovely evergreen perennial. They grow best in shady locations, with plenty of space as they can get quite large. Its white flowers will be on display November through February, giving your lawn a splash of lovely, delicate blooms.

If you’re interested in adding some plants with year-round appeal, give us a call anytime. We can help you to select the right plants for different areas of your lawn. You can schedule an appointment that works for your schedule, and we’ll give you a no-obligation quote for our services.

Common Landscaping Problems

If you’ve been a homeowner for more than a few weeks, you have probably run into at least one landscaping problem. But having the help of a professional landscaping company like Liberty Lawn can go a long way in keeping these problems at bay. Some of these problems are fairly common, and can be difficult to avoid for even the most dedicated homeowner. Here are some of the most common landscaping problems that we see in our neighborhoods.

Planting Mistakes

One of the biggest problems that we see in our client’s landscapes is improper planting. When trees or shrubs are planted too close together, it can cause issues down the road. This can manifest itself in a few different ways:

  • Plants become entangled with each other
  • Plants are undersized because they aren’t getting enough light or nutrition
  • Plants become overgrown too quickly
  • Roots are lifting up pavers or cement


This is why the future growth habits of plants must be considered during the planting phase. Planting mistakes can also lead to less healthy trees and shrubs. This can happen when they are planted in areas that do not meet their needs, such as having the wrong amount of sunlight or water, or having the wrong soil type. In these situations, removing the plant can be the only option to fixing the situation. While it can be difficult to make this decision, it is going to be better for you in the long run as it will mean having healthier plants that need less intensive care.

Improper Mulching

Another common landscaping problem that we see is improper mulching. Many homeowners choose to take on this task by themselves because of how simple it seems. In reality, there is a correct way to mulch – and many incorrect ways. Under-mulching, over-mulching, and uneven mulching are all problems that we see. All of these situations can lead to long-term health problems for your plants. Using the wrong type of mulch, or one of a poor quality, can also cause issues with your plants.

Mulching may seem like an easy task, but even a careless professional can do it incorrectly. Piling too much mulch against a tree can cause bark rot and root damage. Too little much can allow a plant to dry out too quickly. Too much mulch can lead to moss growth and root rot. That is why, if you aren’t sure how to do this task, it is best to give Liberty Lawn a call to handle it for you. The process is quick and inexpensive, and you can be assured that it has been done correctly.

Brown Patches in Your Grass

While having a little dead grass here or there may not seem like a big deal, it can in fact turn into one. There are a few different diseases and pests that can strike lawns, leading to brown patches. Left untreated, these issues can spread and quickly affect your entire lawn. But proper preventative care, as well as proactive care when problems do crop up, can help prevent these issues from getting out of control. Grass can turn brown from more than just disease and pest problems—it can be weather related, irrigation related, and more. But if you have Liberty Lawn keeping a watchful eye on your property, these types of problems can be avoided or at least addressed quickly.

If you have lawn issues you aren’t sure how to deal with, or if you want to hand over your lawn care duties to a professional, give Liberty Lawn a call. You can schedule an appointment that works for your schedule, and we’ll give you a no-obligation quote for our services.

Why Winter Can’t Save Trees From Emerald Ash Borers

Because we live in an area that has cold winters, we can often rely on these chilly temperatures to help us get rid of some annoying plant and lawn pests without treatment. But when it comes to the invasive emerald ash borer, this approach unfortunately does not work. While the cold may kill a few of the emerald ash borers in your ash trees, it will not kill all of them.

Emerald ash borers are a very sturdy tree pest. They burrow deep inside of trees before winter hits in order to hibernate. The insulation from the tree, plus their hibernation cycle, help them to survive throughout the winter. Exceptionally cold temperatures may kill weaker borers, or ones that are inhabiting smaller, younger trees. But the healthier the borer, the more likely they are to survive. This means that, after a particularly harsh winter, you may be left with only the toughest emerald ash borers. This can make it even more difficult to eradicate them during the spring, and that, if they are allowed to breed, they will produce even heartier offspring.

With this in mind, the best approach to preventing and treating these destructive pests is in watching your trees for signs of an emerald ash borer infestation. The signs are often the most noticeable during the fall and winter, when leaves have fallen which allows you to better see the state of the bark and branch attachments. Bark splitting, S-shapes under the bark of your trees, and increased woodpecker activity may all be signs of impending trouble.

If your trees become infested with emerald ash borers, it can take just two to four years for the tree to die if left untreated. In addiction, the borers can spread to neighboring ash
trees, quickly decimating an entire neighborhood.

If you’re concerned that your trees are showing signs of an emerald ash borer infestation, have them inspected immediately by our professional arborists. Schedule your appointment as soon as possible so that we can ensure your ash trees can be saved before the emerald ash borer infestation gets too far advanced.

Fall Deep Root Fertilization for Trees and Shrubs

Just as your lawn needs regular fertilization throughout the year to be healthy and strong, so do you trees and shrubs. Think of fertilizer like food for your plants, helping give them all of the nutrients they need to thrive. But the fertilizer you use on your lawn is not going to have the right nitrogen to phosphorus to potassium ratios. Instead, trees and shrubs need special fertilizers in order to get exactly the right nutrients. They also need to be fed in a different way.

Deep Root Feeding Trees and Shrubs

Feeding a lawn is an easy process; you simply apply fertilizers evenly across the lawn’s surface. The fertilizer only needs to reach the soil, where it is absorbed by the grass’ shallow root system. Unlike grass, trees and shrubs tend to have larger, deeper root systems. Fertilizer cannot always get through the soil to reach deeper roots. In addition, just applying shrub and tree fertilizer to the surface can affect surrounding grass by either damaging it or causing excessive growth. That is why deep root fertilizing is a better option for trees and shrubs.

Deep root feeding is a process best done by a certified arborist. We use specialized equipment to inject fertilizers into the root zone of your trees and shrubs. The most effective way to do this is to make a grid pattern starting at least a foot away from the base of the tree, ending at the drip line or canopy. Smaller trees and shrubs just need to be injected around their perimeter. By injecting the fertilizer evenly throughout the root system, nutrients are placed right where trees and shrubs can best absorb them.

Should all Trees and Shrubs Be Fertilized?

Deep root fertilization is most beneficial to either ornamental or young trees and shrubs. Mature shade trees that are large and well-established tend not to need additional nutrition. Your young and ornamental trees and shrubs will absorb the injected nutrients, allowing them to use it for enhanced growth as well as better root development. This helps them to become healthier overall, and more resistant to disease and insect infestation.

We recommend deep root feeding twice a year, once in spring and again in the fall. By following this feeding schedule, you can help ensure your trees and shrubs stay healthy, reducing the chances of having to remove one due to damage or disease. Schedule your appointment as soon as possible so that we can ensure your trees and shrubs are fertilized before the end of the year!

Preparing Your Lawn for Winter

One of the best parts of summertime is a full, lush lawn of healthy grass. It is a great place for your family to spend time outside without having to leave the comfort of home. But once cold temperatures start coming in, it isn’t enough to just put the lawn chair and toys away. Now is the time to help get your lawn ready for the cold to make sure it comes back as healthy as possible come spring. Here are six ways that you can prepare your lawn for winter.

Know When It’s Time to Stop Mowing

In the fall, you should be mowing every 10 to 14 days until all of the leaves have fallen. This keeps leaves from preventing sunlight and water from getting to your grass, keeping it healthy for winter. It is also best to keep your lawn short, about .75 inches, which helps prevent fungus or molds from growing in a lawn that is too wet from fall storms. Once all of the leaves have fallen, stop mowing and don’t start again until warmer weather returns.

Don’t Forget to Fertilize

While most people only think of fertilizing during the spring in summer, right now is an even more important time to do it. Feeding your lawn before winter means that it has all of the nutrients it needs to get through the winter without damage.

Stop Irrigation

As temperatures drop, your grass doesn’t need as much water. It is important to stop watering, or reduce if the fall is long and warm. This keeps water from freezing on your grass in a sudden overnight temperature drop.

Build Your Compost Pile

With all of the leaves falling, and late season grass clippings, now is a great time to start your compost pile for the spring. Gather everything you need into one area, and pile them up. Add a little water to keep it moist, and turn it every few days, even through the winter. This will help everything to break down, providing you with the best fertilizer for yard projects next year.

Get Rid of Water to Prevent Mosquitoes

While mosquitoes are a summer nuisance, it is now that they lay eggs to hatch in the spring. Take a walk around your property and look for any pools of water, from flower pot saucers to water features, and dump them out. This can help reduce the mosquito population in the spring.

Leave the Snow Where it Falls

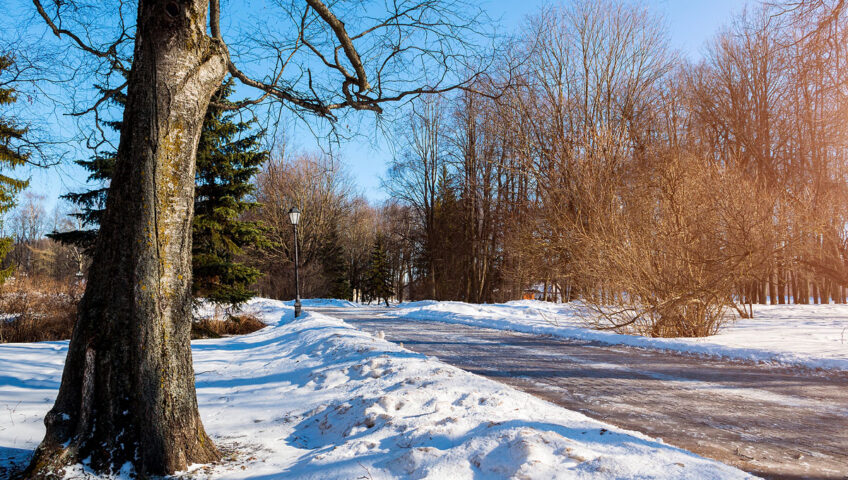
Many people’s first instinct is to remove snow from their lawn when they can. Instead, you should be leaving the snow in place on your grass and garden beds. This is because snow works to insulate your lawn from the cold winter air and harsh winds. Grass that is left uncovered might not grow as well in the spring, making your lawn look patchy and uneven.

If you have any questions about preparing your lawn for winter, we are here to help! Give us a call anytime with any lawn or landscaping questions you may have.

LibertyLawn@gmail.com / 402.423.0061

3810 Cornhusker Hwy, Lincoln, NE 68504 / PO Box 29442. Lincoln, NE 68529

Drought Concerns Going in to Winter

Nebraska’s current drought conditions range from abnormally dry to extreme drought. This makes fall and winter watering extremely important. Homeowners often believe their landscape plants survived a drought year, but then dieback shows up three to five years after a drought. There are a few different ways that drought can affect your landscaping, including:

  • Cold Temperature Injury
    A lack of water creates an increased risk of winter desiccation and cold temperature injury. When a plant is dealing with drought conditions, it can mean the plant cells aren’t as full of water as they need to be. This can make plants less able to protect themselves from damage during colder weather, even when many are usually dormant.
  • Pest Attacks
    Drought conditions create more stress for trees and shrubs. This makes them more susceptible to attack by harmful pests like borers, canker disease and Verticillium wilt. And once these pests have taken hold of a tree or shrub, they can be difficult to treat when a plant is already stressed due to drought.

While most plants benefit from fall watering, the priority should be evergreens, newly planted trees and shrubs and younger woody plants. Soil needs to be kept moist to an 8” to 12” depth from the trunk/stems out to at least the dripline of trees and preferably well beyond. If plants are not mulched, a 3” to 4” deep layer of organic mulch, like wood chips, should be applied in at least a 4’ diameter ring around plants to conserve soil moisture. Winter watering may be needed in the absence of rain/snowfall. Water can be applied early in the day when soils are not frozen and air temperatures are above 40 to 45 degrees Fahrenheit.

Irrigation Systems and Cold Weather

When you are watering during fall, make sure to disconnect hoses at night to prevent freezing of water trapped in the lines. Irrigation lines should be drained and prepped for winter. This will help protect your watering systems and components from freezing winter temperatures, which can cause damage to the system.

As always, we are here to help you with any lawn or landscaping questions you may have. Give us a call anytime!

LibertyLawn@gmail.com / 402.423.0061

Fall Lawn Care

Fall weather is finally here, which means that lawns are going to soon start slowing their growth and going dormant. Most fall core aerations have been completed, and leaf clean ups will begin soon. Here are a few items to keep in mind as we progress towards winter:

Stem Rust in Turfgrass

Stem rust is a fungal disease that develops late in the season on lawns with older bluegrass varieties and slow growth due to low nitrogen. The obvious symptom is rust colored “powder” (fungal spores) on grass blades, shoes and lawn mower. Heavily infected turf may show some yellowing of grass blades. Fungicide controls are recommended or needed for high maintained lawns. Fall lawn care, especially correct nitrogen fertilization, along with cooler fall weather promotes turfgrass growth and rust disappears.

Fall Herbicide Applications

Now is the time to consider applying herbicide for knotweed and crabgrass control. When chemical control is justified, an application with the correct herbicide in the fall can be effective for knotweed. If both crabgrass and knotweed were serious problems this year, prodiamine can be used. It will provide control of both crabgrass and knotweed.

Mowing Tree Leaves into Lawns

Most professional turf managers mulch mow leaves. Mulch mowing can be easier and returns complex organic matter and nutrients to the soil. Some research suggests mulch mowing can even help control weeds. While this weed control benefit can be sporadic, it can help improve the health of your lawn and soil. Mulching leaves is also easier and less time consuming than bagging. Sometimes a double mowing at a slightly higher cutting height will help shred those leaves and bury them in the lawn. The ground tree leaves won’t add to thatch. Up to three inches of leaves can be mowed into turf at a time. Sometimes tree leaves come too fast and quickly pile over the lawn. You will need to rake and bag if that is the case.

Fall Lawn Fertilization

Fall lawn fertilization is best completed before Thanksgiving. Later applications are not well-utilized by turf. Late Fall is the best time to apply root winterizer fertilizer to cool season lawns. Fall is the best time of year to fertilizer your turf for deeper root growth.

Late Fall Perennial Weed Control

Herbicide applications for perennial weed control can still be made effectively while the following conditions apply.

  • Daytime temperatures are above 45°F.
  • Weeds have green leaves and can uptake herbicides.
  • Soils are not frozen.

We will begin Lawn Care Application #5 (Lawn Winterizer) and Fall Weed Control very soon. As always, we are here to help you with any lawn or landscaping questions you may have. Give us a call anytime!

LibertyLawn@gmail.com / 402.423.0061

It’s Time for Core Aerations

Now that September is over and October is just beginning, it’s time to start scheduling your fall core aeration appointment. Core aeration is a great way to help feed your lawn before it goes into dormancy for the winter in order to promote lush and full grass come spring. If your grass is looking thin or yellowed, your soil is hard to the touch or develops puddles during rainstorms, you may have compaction problems. It’s easy to test for compaction yourself with a simple test. Take a regular screwdriver and stick it into your soil by hand. It should slide in fairly easily, but if it is difficult to get the screwdriver in more than an inch, your soil is compacted. Read on to learn more about how aeration can help reduce compaction and benefit your lawn.

What is Core Aeration?

Healthy lawns all have one major thing in common: air pockets within the soil. While it may seem counterintuitive, these pockets are essential for allowing a healthy root system to develop. As soil is compacted by things like foot traffic or a thick layer of thatch, these air pockets are reduced or eliminated. This can lead to issues like moss or weed growth, as well as stunted grass growth.

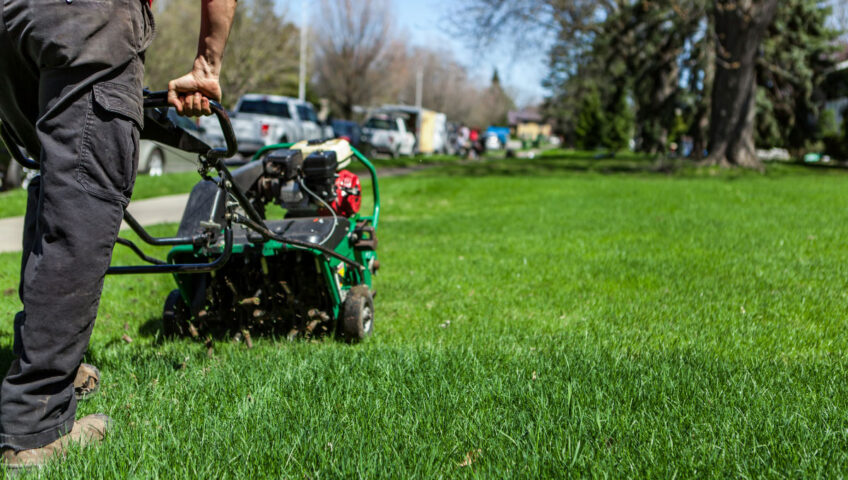
Core aeration is a type of lawn aeration that relies on a machine called a lawn aerator. This machine removes small plugs or “cores” of soil from your lawn, as well as thatch, to reduce compassion in order to allow more air to get into your soil. It also creates a channel through with water and nutrients can get under your grass to feed it at the roots. While there are other ways to aerate your lawn, these methods often create cores that are too small for maximum penetration. By using a lawn aerator, we are able to remove plugs that are ½ to ¾ of an inch in diameter, providing maximum access for water, air, and fertilizer.

Performing a core aeration on your lawn can help solve many different types of common lawn problems. It can eliminate moss that is growing in areas with poor drainage due to compaction, as well as help grass regrow stronger in areas where it was previously struggling to survive.

When is the Best Time to do Core Aeration?

For the cool-season grasses most common in our area, core aeration is best done right now in early fall. If you are growing a warm-season grass, core aeration is best done during mid-spring to early summer.

If you’re ready to have your core aeration done, give us a call to set up an appointment. As always, we are here to help you with any lawn or landscaping questions you may have!

LibertyLawn@gmail.com / 402.423.0061

3810 Cornhusker Hwy, Lincoln, NE 68504 / PO Box

September Updates

The summer heat may still be here, but with October just around the corner, it’s time to start thinking about fall landscaping tasks. Here’s a list of things that your lawn may need to have done in the next six weeks.

Lawn Reseeding/Overseeding

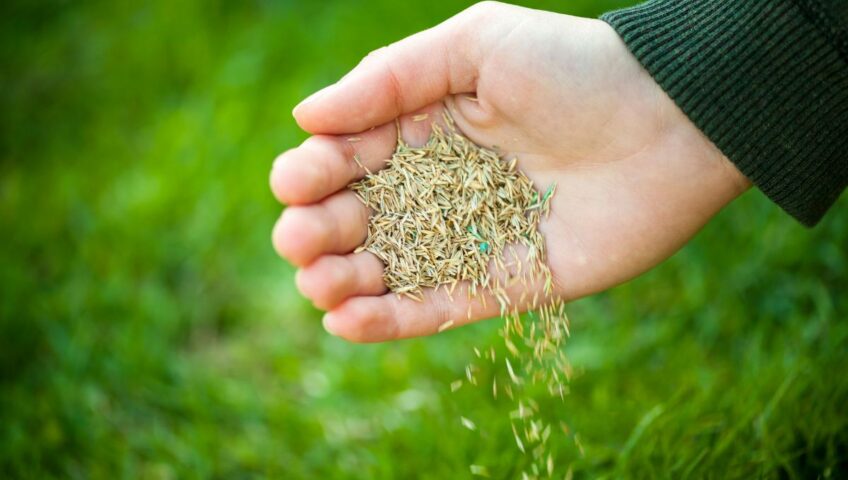
The time for lawn seeding is getting short, so it’s important to complete seeding/overseeding as soon as you can. For cool season grasses, Kentucky bluegrass and tall fescue, late August into mid-September is the best time for seeding. Perennial ryegrass is not recommended for use in Nebraska lawns.

The seeding window is getting smaller, but there is still time to seed. Preparing the seedbed is always a very important first step, whether doing a complete renovation or overseeding. The key to success is seed to soil contact. When purchasing seed, buy from a reputable retailer and look for blue tag certified seed to avoid planting a problem.

Lawns that have recently been seeded or overseeded some damage may be expected on newly germinated lawns if temperatures dipped below 28° F. As cool season grasses, newly germinated Kentucky bluegrass and tall fescue seedlings can tolerate light frost, down to approximately 30-32° F, but hard freeze temperatures below 28° F will likely cause some seedling death if plants are less than 7 days old.

Lilac Leaf Browning

In the last few weeks, many lilacs have suffered severe leaf browning. This is caused by the fungal disease Pseudocercospora. It shows up as brown spots on the leaves, moving from the edge of the leaves inward, sometimes splotchy in appearance. The fungus is favored by moderate summer temperatures and high humidity. It is common when temperatures are around 76 degrees but the infection occurs at least 7 days before any symptoms are seen on the plant.

Because high humidity favors disease development, increasing airflow around and through lilac stems will help reduce disease severity by decreasing leaf wetness time following rain or a heavy dew. Prune affected plants by cutting out 1/3 of stems, removing the largest canes and those canes that are cankered, girdled or completely dead.

The fungus can survive for at least 2 years on plant debris, so fall cleanup of the infected leaves will also help reduce disease pressure next year. Fungicides are not effective at this time on plants already infected. Next year, fungicide should be applied in the spring when the leaves first emerge.

Perennial Weed Control

Fall is the best time to control perennials broadleaf weeds in turf. Fall applications are more effective because weeds are translocating stored energy (and properly applied herbicide) into roots and other underground structures. For the best control, an herbicide should be applied by the end of October. A second application can be made 3 to 4 four weeks after the first if targeted weeds have not been controlled by the initial application. Single applications applied later in fall can still be effective if soil moisture isn’t limited at the time of application, but control may not be evident until spring. Herbicides are most effective when spot applied to actively growing weeds that are not stressed by extreme temperatures, drought, etc.

Fall Lawn/Landscape Clean Up

Some insect pests overwinter in or on overwintering garden debris. For example, Iris borers spend the winter as eggs on old iris leaves and plant debris at the base of iris stalks. Squash vine borers overwinter as cocoons in the ground or on leaf litter, and squash bugs find shelter in the fall under dead leaves, rocks, wood, and other garden debris. As the landscape season winds down, practicing fall sanitation and removing plant debris is an important piece of the management puzzle for reducing serious pest population levels.

As always, we are here to help you with any lawn or landscaping questions you may have. Give us a call anytime!

LibertyLawn@gmail.com / 402.423.0061

3810 Cornhusker Hwy, Lincoln, NE 68504 / PO Box 29442. Lincoln, NE 68529