How do You Cut Down a Big Tree?

If you have a big tree that is dying, or that is posing a danger to your home, often the best decision is to cut it down. This task should only be tackled if you are comfortable with a chainsaw, and willing to follow a few different safety precautions. If you’re looking to cut down a tree, here are nine steps you should follow to do it safely and correctly.

  1. Decide if it’s Safe

While cutting down small trees is often a quick and easy process, cutting down larger ones is a pretty big job. If the tree has a lot of broken or dead branches, or if it has an undiagnosed disease, it is best to call an expert for help. Dead or loose branches can fall on you while you are working, and some diseases can be spread if you aren’t careful. Walk around your tree to check for these issues. While you’re at it, check to make sure you aren’t at risk of knocking down any power lines or hitting any buildings. If these obstacles are in your way, it is going to be safer to call in an arborist to deal with the tree for you in a safe way.

  1. Gather Equipment

As with all DIY jobs, making sure that you have the right safety gear should be the first task on your list. Here is what you will need to cut down a tree:

  • Hard hat
  • Safety glasses
  • Hearing protection
  • Work gloves
  • Chainsaw
  • Felling wedges

Another good safety idea is to have a friend or family member on hand to help. A second set of eyes can alert you if anything is going wrong, or if something or someone comes too close to the tree while you are working on cutting it down.

  1. Estimate the Fall

Before you start cutting, you need to figure out where the tree is going to fall. If it has more branches on one side than another, it will fall that way regardless of how you cut it. You will also need to estimate how tall the tree is so you can be sure there is enough room for it to fall. One trick to estimate this is to hold an ax at arm’s length, close one eye, then walk away from the tree. When the top and bottom of the ax are lined up with the top and bottom of the tree, you are standing about where the top of the tree will be when it falls.

  1. Plan Escape Routes

Having at least two escape routes planned in advance will ensure that you have a clear path to get away if anything goes wrong. Make sure the routes are clear of debris, and will take you far enough away that, if the tree falls where you don’t want it to, you aren’t at risk of getting hit by it.

  1. Plan the Notch

The notch is what will determine which direction the tree falls in. The notch needs to be on the “fall side” of the tree, which should also be the heaviest side of the tree. Make sure to plan the notch at a comfortable working height, so you aren’t having to bend over too far. The stump can always be cut down closer to the ground, or removed entirely, once the tree is gone.

  1. Cut the Notch

Start with the top cut of the notch, moving at about a 45 degree downward angle. Cut about ⅓ of the way into the trunk. Then, make a second cut below the first parallel to the ground. This cut should meet, or come pretty close to meeting, the first cut.

  1. Insert Wedges

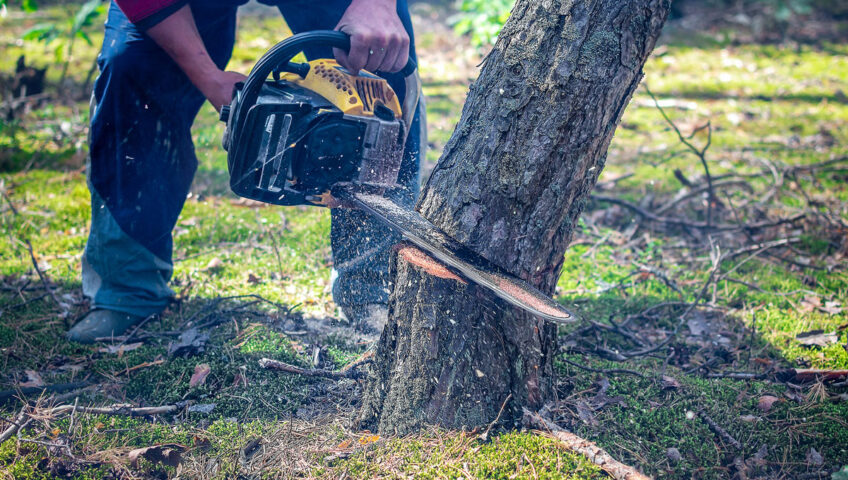
If the tree’s trunk is more than 18 inches in diameter, you will need to use felling wedges. These handy plastic devices help prevent your saw from becoming trapped in the tree while you are cutting. These wedges need to go into the bottom cut as soon as you’ve cut deep enough to get them inserted. Stop cutting, pound them in with a hammer, and then complete the cut.

  1. Make the Felling Cut

This is the cut that will make the tree fall. You will make this cut on the opposite side of the tree from the notch. Start the cut about an inch above the notch, keeping the chainsaw parallel to the ground. Go slowly, as you do not want to cut all of the way through. Once the tree starts to fall, stop cutting and walk one of your escape routes to get out of the way.

  1. Remove Branches and Cut into Firewood

Once the tree is down, the next step will be removing all of the branches from the trunk. After that, cut the tree truck into more manageable pieces for removal. You can either keep the tree for firewood, or call your city to ask about proper disposal options.

When in Doubt, Get Expert Tree-Cutting Help

While cutting down a tree may seem like no big deal, it can in fact pose a risk to your property. From trees that fall where you don’t want them to, to trees that are taller than the area they have to fall in, there are many issues that can arise when you take down a tree. When in doubt, it is always best to call on a professional for help. Our licenced arborists have years of training with all types of tree services, and can help by taking down your tree in the safest, most efficient way. Give us a call anytime for a free consultation.

Common Landscaping Problems

If you’ve been a homeowner for more than a few weeks, you have probably run into at least one landscaping problem. But having the help of a professional landscaping company like Liberty Lawn can go a long way in keeping these problems at bay. Some of these problems are fairly common, and can be difficult to avoid for even the most dedicated homeowner. Here are some of the most common landscaping problems that we see in our neighborhoods.

Planting Mistakes

One of the biggest problems that we see in our client’s landscapes is improper planting. When trees or shrubs are planted too close together, it can cause issues down the road. This can manifest itself in a few different ways:

  • Plants become entangled with each other
  • Plants are undersized because they aren’t getting enough light or nutrition
  • Plants become overgrown too quickly
  • Roots are lifting up pavers or cement


This is why the future growth habits of plants must be considered during the planting phase. Planting mistakes can also lead to less healthy trees and shrubs. This can happen when they are planted in areas that do not meet their needs, such as having the wrong amount of sunlight or water, or having the wrong soil type. In these situations, removing the plant can be the only option to fixing the situation. While it can be difficult to make this decision, it is going to be better for you in the long run as it will mean having healthier plants that need less intensive care.

Improper Mulching

Another common landscaping problem that we see is improper mulching. Many homeowners choose to take on this task by themselves because of how simple it seems. In reality, there is a correct way to mulch – and many incorrect ways. Under-mulching, over-mulching, and uneven mulching are all problems that we see. All of these situations can lead to long-term health problems for your plants. Using the wrong type of mulch, or one of a poor quality, can also cause issues with your plants.

Mulching may seem like an easy task, but even a careless professional can do it incorrectly. Piling too much mulch against a tree can cause bark rot and root damage. Too little much can allow a plant to dry out too quickly. Too much mulch can lead to moss growth and root rot. That is why, if you aren’t sure how to do this task, it is best to give Liberty Lawn a call to handle it for you. The process is quick and inexpensive, and you can be assured that it has been done correctly.

Brown Patches in Your Grass

While having a little dead grass here or there may not seem like a big deal, it can in fact turn into one. There are a few different diseases and pests that can strike lawns, leading to brown patches. Left untreated, these issues can spread and quickly affect your entire lawn. But proper preventative care, as well as proactive care when problems do crop up, can help prevent these issues from getting out of control. Grass can turn brown from more than just disease and pest problems—it can be weather related, irrigation related, and more. But if you have Liberty Lawn keeping a watchful eye on your property, these types of problems can be avoided or at least addressed quickly.

If you have lawn issues you aren’t sure how to deal with, or if you want to hand over your lawn care duties to a professional, give Liberty Lawn a call. You can schedule an appointment that works for your schedule, and we’ll give you a no-obligation quote for our services.

Preparing Your Lawn for Winter

One of the best parts of summertime is a full, lush lawn of healthy grass. It is a great place for your family to spend time outside without having to leave the comfort of home. But once cold temperatures start coming in, it isn’t enough to just put the lawn chair and toys away. Now is the time to help get your lawn ready for the cold to make sure it comes back as healthy as possible come spring. Here are six ways that you can prepare your lawn for winter.

Know When It’s Time to Stop Mowing

In the fall, you should be mowing every 10 to 14 days until all of the leaves have fallen. This keeps leaves from preventing sunlight and water from getting to your grass, keeping it healthy for winter. It is also best to keep your lawn short, about .75 inches, which helps prevent fungus or molds from growing in a lawn that is too wet from fall storms. Once all of the leaves have fallen, stop mowing and don’t start again until warmer weather returns.

Don’t Forget to Fertilize

While most people only think of fertilizing during the spring in summer, right now is an even more important time to do it. Feeding your lawn before winter means that it has all of the nutrients it needs to get through the winter without damage.

Stop Irrigation

As temperatures drop, your grass doesn’t need as much water. It is important to stop watering, or reduce if the fall is long and warm. This keeps water from freezing on your grass in a sudden overnight temperature drop.

Build Your Compost Pile

With all of the leaves falling, and late season grass clippings, now is a great time to start your compost pile for the spring. Gather everything you need into one area, and pile them up. Add a little water to keep it moist, and turn it every few days, even through the winter. This will help everything to break down, providing you with the best fertilizer for yard projects next year.

Get Rid of Water to Prevent Mosquitoes

While mosquitoes are a summer nuisance, it is now that they lay eggs to hatch in the spring. Take a walk around your property and look for any pools of water, from flower pot saucers to water features, and dump them out. This can help reduce the mosquito population in the spring.

Leave the Snow Where it Falls

Many people’s first instinct is to remove snow from their lawn when they can. Instead, you should be leaving the snow in place on your grass and garden beds. This is because snow works to insulate your lawn from the cold winter air and harsh winds. Grass that is left uncovered might not grow as well in the spring, making your lawn look patchy and uneven.

If you have any questions about preparing your lawn for winter, we are here to help! Give us a call anytime with any lawn or landscaping questions you may have.

LibertyLawn@gmail.com / 402.423.0061

3810 Cornhusker Hwy, Lincoln, NE 68504 / PO Box 29442. Lincoln, NE 68529

September Updates

The summer heat may still be here, but with October just around the corner, it’s time to start thinking about fall landscaping tasks. Here’s a list of things that your lawn may need to have done in the next six weeks.

Lawn Reseeding/Overseeding

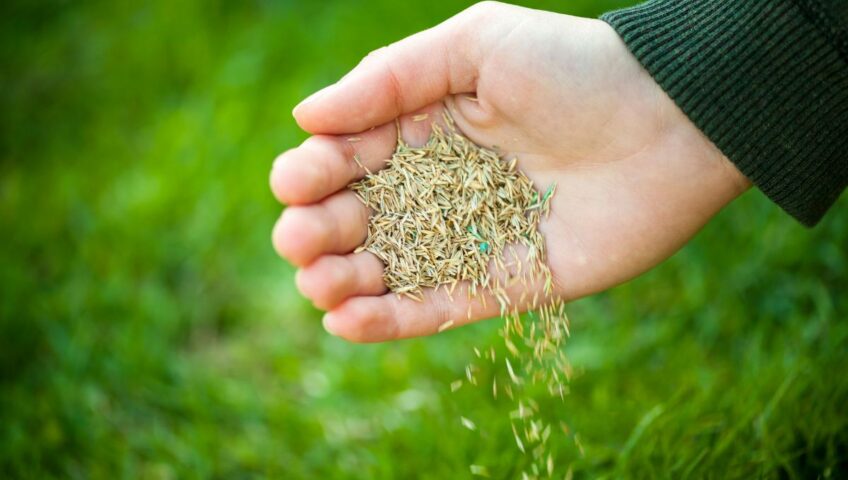
The time for lawn seeding is getting short, so it’s important to complete seeding/overseeding as soon as you can. For cool season grasses, Kentucky bluegrass and tall fescue, late August into mid-September is the best time for seeding. Perennial ryegrass is not recommended for use in Nebraska lawns.

The seeding window is getting smaller, but there is still time to seed. Preparing the seedbed is always a very important first step, whether doing a complete renovation or overseeding. The key to success is seed to soil contact. When purchasing seed, buy from a reputable retailer and look for blue tag certified seed to avoid planting a problem.

Lawns that have recently been seeded or overseeded some damage may be expected on newly germinated lawns if temperatures dipped below 28° F. As cool season grasses, newly germinated Kentucky bluegrass and tall fescue seedlings can tolerate light frost, down to approximately 30-32° F, but hard freeze temperatures below 28° F will likely cause some seedling death if plants are less than 7 days old.

Lilac Leaf Browning

In the last few weeks, many lilacs have suffered severe leaf browning. This is caused by the fungal disease Pseudocercospora. It shows up as brown spots on the leaves, moving from the edge of the leaves inward, sometimes splotchy in appearance. The fungus is favored by moderate summer temperatures and high humidity. It is common when temperatures are around 76 degrees but the infection occurs at least 7 days before any symptoms are seen on the plant.

Because high humidity favors disease development, increasing airflow around and through lilac stems will help reduce disease severity by decreasing leaf wetness time following rain or a heavy dew. Prune affected plants by cutting out 1/3 of stems, removing the largest canes and those canes that are cankered, girdled or completely dead.

The fungus can survive for at least 2 years on plant debris, so fall cleanup of the infected leaves will also help reduce disease pressure next year. Fungicides are not effective at this time on plants already infected. Next year, fungicide should be applied in the spring when the leaves first emerge.

Perennial Weed Control

Fall is the best time to control perennials broadleaf weeds in turf. Fall applications are more effective because weeds are translocating stored energy (and properly applied herbicide) into roots and other underground structures. For the best control, an herbicide should be applied by the end of October. A second application can be made 3 to 4 four weeks after the first if targeted weeds have not been controlled by the initial application. Single applications applied later in fall can still be effective if soil moisture isn’t limited at the time of application, but control may not be evident until spring. Herbicides are most effective when spot applied to actively growing weeds that are not stressed by extreme temperatures, drought, etc.

Fall Lawn/Landscape Clean Up

Some insect pests overwinter in or on overwintering garden debris. For example, Iris borers spend the winter as eggs on old iris leaves and plant debris at the base of iris stalks. Squash vine borers overwinter as cocoons in the ground or on leaf litter, and squash bugs find shelter in the fall under dead leaves, rocks, wood, and other garden debris. As the landscape season winds down, practicing fall sanitation and removing plant debris is an important piece of the management puzzle for reducing serious pest population levels.

As always, we are here to help you with any lawn or landscaping questions you may have. Give us a call anytime!

LibertyLawn@gmail.com / 402.423.0061

3810 Cornhusker Hwy, Lincoln, NE 68504 / PO Box 29442. Lincoln, NE 68529

Late Summer Lawn Maintenance

It’s the time of the year where we here at Liberty Lawn start thinking about late summer and fall lawn maintenance. There are a few different turf issues you should be on the lookout for, as well as some maintenance tasks that should be scheduled soon.

Gray Leaf Spot in Turf

This disease primarily affects perennial ryegrass and tall fescue. Kentucky bluegrass is resistant. High heat and humidity help this disease develop rapidly. Symptoms start as small, water-soaked lesions, progressing to leaf death. As leaves die, they twist and develop a Shepherd’s hook appearance. Disease in mixed grass stands look sparse as leaves die, and can often be confused with wilt or heat stress. Gray leaf spot is most severe in highly fertilized turf, or those stressed by environmental factors (soil compaction, drought, etc.) Leaf wetness favors infection, so irrigation should be done in the morning to allow grass leaf blades to dry before evening. Strobilurin fungicides and thiophanate-methyl provide the most effective control.

Dollar Spot in Turf

This is a minor disease for most home lawns. To identify dollar spot, symptoms appear as four to six-inch, straw-colored patches of blighted turf. A bleached lesion in the shape of an hour glass is present on the leaf blade. The lesion has a characteristic reddish-brown margin. In early, dewy mornings, a cobweb-like mycelium is visible in the affected area. Applications of a lawn fungicide will be needed to control this disease.

Winter Annual Weed Control

It’s time to start applying pre-emergent herbicide to control winter annuals in lawns. Common winter annuals include little barley, henbit and corn speedwell. Winter annuals germinate in fall, survive the winter, then grow, bloom, go to seed and die the following spring/summer. Maintaining a dense turf and tall mowing height to help lawns shade out and compete with weeds, along with the use of a herbicide applied in early-mid September provides the most effective control.

Lawn Renovation & Overseeding

LATE AUGUST TO MID-SEPTEMBER

Late August to mid-September is the time to start thinking about lawn renovation and overseeding for cool season grasses, including Kentucky bluegrass and tall fescue. Now is the time to prepare the seed areas, whether doing a complete renovation or over seeding. When purchasing seed, buy from a reputable retailer and look for blue tag certified seed to avoid planting a problem.

As always, we are here to help you with any turf and lawn questions you may have. Give us a call anytime!

LibertyLawn@gmail.com / 402.423.0061

3810 Cornhusker Hwy, Lincoln, NE 68504 / PO Box 29442. Lincoln, NE 68529

How to Trim Your Bushes

Though perhaps not the most popular types of landscaping plant, bushes, shrubs, and hedges are beautiful plants that add natural beauty and curb appeal to your home. Easy-to-maintain and often vibrant year-round, they make a great addition to accent your lawn, trees, gardens, and hardscapes, such as walks, patios and walls. They can also be great ways to provide a windbreak, privacy screen, or even a living fence around your yard. Keep reading to learn about the types of trimmers you can opt to use, as well as some tips on how to trim bushes yourself.

Types of Trimmers

If your bushes are left to become overgrown, however, they can negatively impact your curb appeal, making your yard look messy and unkempt. But maintaining these types of plants is actually quite simple, thanks to readily available and affordable hedge trimmers. There are three types of hedge trimmers available, depending on your individual needs and preferences:

  • Gas-powered Trimmers

These trimmers have the most powerful engines, and are best for cutting through thicker branches. They also have the advantage of not being tethered by a cord, which makes them a great option for people with large yards. They can be more expensive than other trimmer options, and require you to mix a small amount of oil with the gas in order to keep the engine lubricated.

  • Corded Trimmers

Less expensive in quieter than gas-powered trimmers, corded trimmers are a great option for those with smaller yards and are virtually maintenance-free. You also don’t have to worry about using a pull-start or a choke to get it going each time you use it. They are slightly less powerful, making them better suited to small and medium-sized bushes.

  • Cordless Trimmers

While cordless trimmers have been around for a number of years, it was only recently that, thanks to advancements in battery technology, that they became a popular option for trimming bushes. Much like corded trimmers, they require little maintenance, are easy to start, and are very quiet. While they can be less expensive than gas-powered trimmers, many require you to purchase the battery and charger separately, which can make them more expensive than corded options.

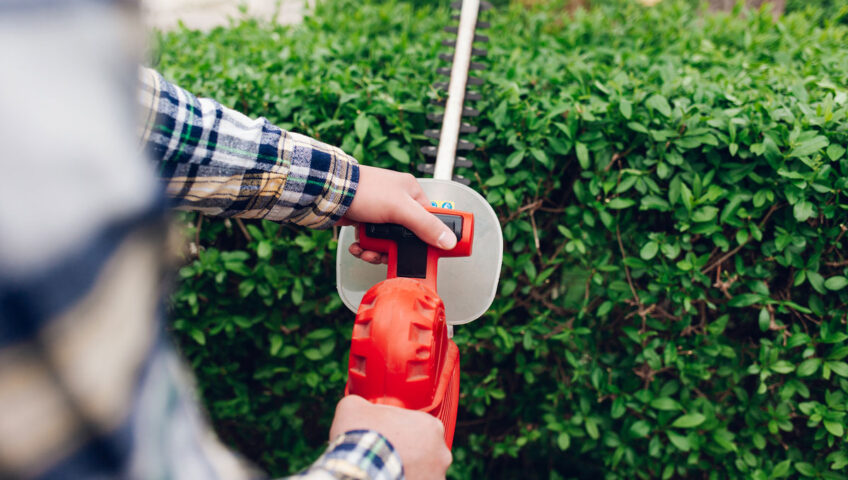
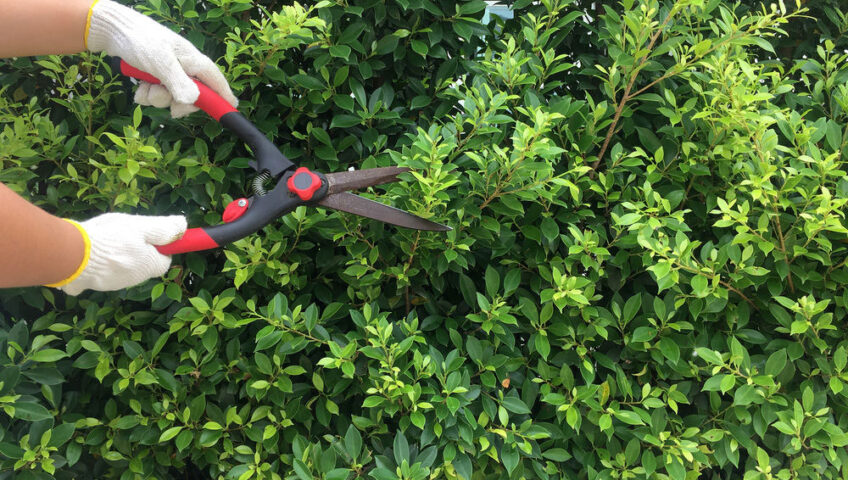
Hedge trimmers are very simple to use, though it is important to be careful as they have sharp blades. Always keep two hands on your trimmer when it is turned on. If you find a branch that is too thick to cut with your trimmers, never try to hold it still with one hand while cutting. Instead, use a pair of hand pruners to ensure you don’t accidentally injure yourself or the bush with your powered trimmers.

Trimming Your Bushes

The number of times you trim your bushes every year depends on the look you’re going for. If you want less formal, more natural-looking bushes, trim them just once or twice a year. For more formal bushes and hedges, you’ll want to trim three to four times per year.

Start trimming your bush from the bottom and work your way up, taking on a little bit off at a time. Avoid trimming the bush into a “V” shape, which discourages light from getting to the bottom branches and root system, and can make them lose their leaves or needles. Instead, aim for a shape that is slightly wider at the bottom, which allows optimal exposure to sunlight and promotes a full, lush bush.

To cut the top flat, hold the blade level with the ground and move from right to left, then left to right. Take only a little bit off at a time, guiding the blade as level as possible. For tall bushes or hedges, you can use stakes with a string tied across them as a guide to get a straight, even cut. Stop as you go to use your hands to remove cut pieces from the bush. It will likely take several passes to get the bush into the shape you want.

Make sure to trim bushes in the early morning or late afternoon to avoid sunburning the freshly cut branches. You should also avoid trimming bushes in early spring when birds are nesting. When you’re done trimming the bush, you should go through it by hand with your pruning shears to find and remove any dead or diseased branches inside of the plant.

If you aren’t confident trimming your own bushes, Liberty Lawn is here to help. We offer all kinds of yard services, including bush trimming, to keep your yard looking its best all season long. Give us a call today to schedule a free consultation!

How to Fertilize Your Lawn

All plants need more than just water and sunlight to thrive, and grass is no exception. Applying fertilizer to your lawn feeds it necessary nutrients that it needs to grow thick and lush. Maintaining a thick, lush lawn helps prevent weeds from sprouting and moving in, allows your lawn to fight off disease, and helps roots retain more water during warm summer days.

Most fertilizers are only effective for 6 to 8 weeks, so maintaining a regular fertilization schedule is essential in keeping your lawn healthy all season long. Here are the steps you should take to fertilize your lawn:

  1. Water your lawn. A day or two before you fertilize your lawn, give it a good watering. Ensuring your soil is damp, but not soaking wet, helps the soil absorb the fertilizer.
  2. Pick the best spreader for your lawn. There are a few different types of spreaders, and you’ll want to be sure you have the correct one to make the application quick and easy. For small lawns, a handheld spreader can work just fine, whereas people with bigger lawns will benefit from a push-type spreader. Make sure to adjust the spreader settings. Each fertilizer product has a spreader setting on the package to ensure correct coverage.
  3. Start by applying grass fertilizer around the perimeter. It is always best to start applying fertilizer around the perimeter of your grass, as it is the easiest area to accidentally miss spots. Simply walk around the entire perimeter, ensuring you move steadily for an even application.
  4. Fill in the middle. Similar to a mowing pattern, feed your lawn by walking back and forth in straight lines, making sure to overlap slightly with each pass.
  5. Properly store any remaining product. Once you’ve finished fertilizing your lawn, return any unused product to the bag and store it for future use. Be sure to keep it in a cool, dry place away from pets and children.

We hope that this article has helped you to learn about the benefits of fertilizing your lawn. If you aren’t certain which fertilizer is best for your individual needs, or aren’t able to fertilize on a regular schedule, Liberty Lawn is here to help. We offer all kinds of yard services, including lawn fertilization, to keep your yard healthy and looking good all season long. Give us a call today to schedule a free consultation!

Spring Yard Cleanup Checklist

Now that temperatures are finally rising and spring is in the air, it’s time to consider completing some spring cleaning tasks for your yard. Yards that are left unkempt not only look unsightly, but they also aren’t able to maximize their growing potential throughout the season. We’ve come up with a spring yard cleanup checklist to help you get your yard nice and tidy in time for spring and summer outdoor activities.

  • Check for lawn damage and prep for reseeding.

While your grass can withstand cold winter temperatures while hibernating, sometimes you’ll end up with damage from traffic, road salt, or disease. Prepare to reseed damaged areas by removing dead areas with a heavy square metal rake. Then, apply a ¼ layer of compost to help give seeds a jump-start when it is time for planting.

  • Prune dead and damaged branches on shrubs and trees.

Any branches that have been damaged by winter weather should be trimmed back to keep your shrubs and trees happy and healthy throughout the growing season. If you have hedges, use hand shears to shape them as electric shears can cause damage that prevent the hedge from being able to grow a nice thick outer layer. Prune summer-flowering shrubs, such as Rose of Sharon, before buds swell, but wait to prune spring bloomers, like forsythia, until after they flower.

  • Cut back and divide your perennial plants.

To start, prune flowering perennials to a height of 4 to 5 inches and ornamental grasses to 2 to 3 inches. This helps to encourage vigorous new growth. As soon as the ground has thawed, it is safe to dig up perennials to thin your beds or transplant them to other areas of your yard. Make sure to leave at least three stems per clump. Cut back any rose canes that have been damaged to about 1 inch below any blackened areas.

  • Clean up fallen leaves and debris.

All leaves, dead foliage, or remaining dead annuals should be cleaned up and removed from your yard. Now is also a good time to remove any mulch that you plan to replace, which also allows you to see heaved plants that need to be tamped back into the ground.

  • Start your compost pile.

If you choose to compost your yard waste, now is the time to start your new compost pile with the debris and old mulch that you’ve collected from around your yard. Shred leaves and chip branches over ½ inch in diameter if you can, or add a bagged compost starter to give the pile a boost. Make sure to keep it evenly damp, and aerate it with a pitchfork every two weeks.

  • Tidy up paths and patios.

If any decorative gravel has moved out of its boundaries during the winter, now is the time to rake it back to where it belongs. Order more gravel to fill any areas that are thin or bare. Remove any pavers that have been heaved by winter freezes, tamp down and add base material as needed to get it back to level. If you have flagstones, refill joints with new sand or stone dust as needed.

  • Replace or repaint wood fences and trellises.

Start by checking that all posts are still securely in the ground, then remove any badly damaged pickets, boards, or lattices. Next, scrape off any loose old paint and sand smooth for the best results. Install new wood and perform any required patching with wood epoxy. Once temperatures are above 50 degrees, you can apply your new paint.

We hope this checklist has helped inspire you to get your yard back in shape this spring. If you simply don’t have the time or the patience to do your spring yard cleanup, we offer many different services to meet your needs. Give us a call to set up a free estimate today!

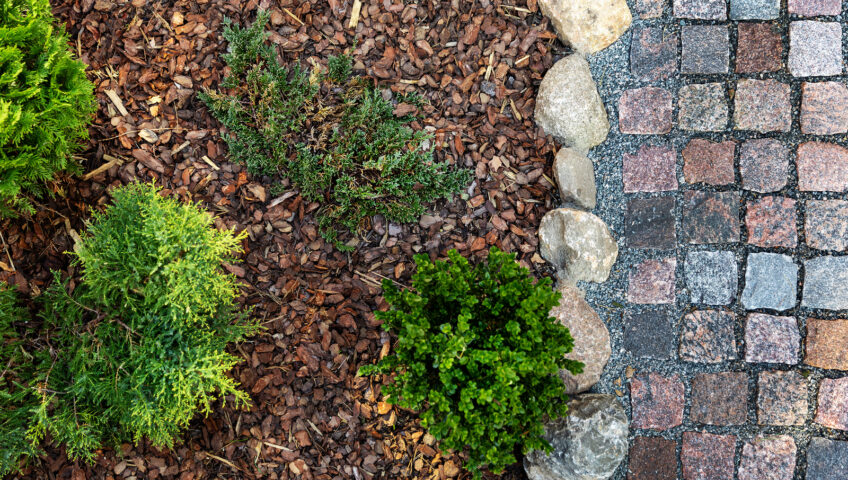
Rocks vs. Mulch – Which is Better in Flower Beds & Around Trees?

Whether you are considering adding mulch to your flower beds or around your trees, there are many different points to consider. Which looks better? Which benefits my plants more? Which is lower maintenance? Let us help you answer some of these questions by listing the pros and cons of the two most popular mulch options: organic mulch and river rocks.

Organic Mulch

Pros

  • Better Growth: Mulch can nearly double how fast trees and plants grow, according to studies.
  • Less Water: Mulch reduces water evaporation, so you spend less time and money watering!
  • More Nutrients: As mulch breaks down, it adds nutrients that plants need to thrive.
  • Fewer Weeds: Mulch stops weed seeds from sprouting, so you may see 50 percent fewer weeds.
  • Just the Right Temperature: Mulch keeps plants warm in the winter and cool in the summer.
  • Reduce Compaction and Erosion: Mulch reduces soil erosion by up to 85 percent. Plus, people are less likely to walk on mulch, so there’s less soil compaction.

Cons

  • Annual Replacement: Depending on your mulch type, you’ll have to replace it every one to four years. So, it’s a recurring cost and time expense.
  • Too much of a Good Thing: Adding a layer of mulch more than 2-3 inches of mulch stresses out plants.
  • Too Early = Late Blooms: Mulching too early may slow how quickly the ground warms, which means you could see blooms a bit later than normal.
  • Too Late = Weeds: Mulch stops weeds from germinating. If you mulch too late, it may not stop them as much.
  • Check for Seeds: Some organic mulches, like pine bark and hay, may have weed seeds in it.

River Rocks

Pros

  • Low Maintenance: You almost never need to replace them.
  • Lower Cost: Because they’re longer lasting, it is generally less expensive to mulch with rocks.
  • Fire-Proof: If you live in an area with wildfires, rocks could be better since they’re nonflammable.
  • Weeds Be Gone: Rocks can keep weeds away longer.
  • Wind-Resistant: Heavy rocks are great at preventing soil erosion in windy areas.
  • Perfect for Rock and Cacti Gardens: Rocks are just right for these garden spaces!

Cons

  • Too Hot: Rocks, especially lighter ones, raise the soil temperature, leading to stressed, thirsty plants.
  • No Benefit to Plants: Rocks don’t aid plant growth or soil health.
  • Messy pH: Most trees prefer acidic soil, but rocks create alkaline soil, which can hurt trees.
  • Return of the Weeds: Wind will eventually blow soil between rocks, creating a spot for weeds to grow.
  • No Good for Pruning: Rocks can prohibit rejuvenation pruning, creating unwieldy shrubs.
  • Remove by Hand: If you want to remove stones, you must do it manually, which can be tedious!

Our Verdict

Organic mulch is much better overall for the health of your flower beds and trees. Stone, however, is better than no mulch at all if you absolutely must have rock. Still unsure of what you’d like in your landscaping? Give us a call or send an email to get our expert opinion.

LibertyLawn@gmail.com / 402.423.0061

3810 Cornhusker Hwy, Lincoln, NE 68504 / PO Box 29442. Lincoln, NE 68529

Pruning Tips for Spring

Pruning Tips for Spring

Spring is just around the corner, which means that now is a good time to start thinking about pruning your trees and shrubs. Well-maintained trees and shrubs don’t just look better, they’re also healthier. Pruning helps plants maintain their shape, encourages new growth, and helps prevent pests and diseases. We’ve got some tips in order to help you to time your pruning based on what’s right for each of your trees and shrubs.

Trees

Recent research has shown that the optimum time to prune living branches on trees is late spring and early summer. Pruning at this time helps trees to quickly seal off wounds, because tree cells are most active during the growing season. Pruning outside of this timeframe can still be accomplished with little risk to plants, and should always be done as quickly as possible to repair tree damage that occurs during a wind or ice storm. The only exception to these tips is for oak trees, which are best pruned in December, January or February, as this helps to avoid potential infection with oak wilt.

Shrubs

The correct time to prune your shrubs depends on their variety. Summer-flowering shrubs, such as spirea, potentilla, and smoke bush, should be pruned during dormancy, typically late February to March. Spring-flowering shrubs, such as forsythia, weigela, mock orange, lilacs, and viburnums, should be pruned when they are finished blooming.

Fruit Trees

Fruit tree pruning is often neglected either due to a lack of pruning skills and knowledge, or a fear that the tree will be damaged or killed by incorrect pruning. But productive fruit trees that have an abundance of high quality fruit do not just happen by chance. They are the result of good cultural practices, including proper pruning.

Most fruit tree pruning is best done during the dormant season when no leaves are on the tree. For most fruit trees, late February through March is the best time to prune. Tree species that are susceptible to winter injury, such as peach and apricot, are best pruned in late spring before growth begins. Regardless of the cultivar, do not prune any tree before January or winter injury can occur.

Fruit trees may also be safely pruned outside of their dormant period. Trees may be prune at planting, during July and early August to restrict growth, to remove water sprouts, or to remove diseased or damaged wood. Once the basic structure of your fruit tree is developed, you should avoid pruning until fruiting occurs.

We hope these tips have helped to clear up any confusion you may have had about tree and shrub pruning. If you’re ever in doubt about pruning, or would like to have a professional tackle the task for you, give us a call to set up an appointment today!